Table of Contents
Introduction
If you are new to SFM compile, you may wonder what it actually means. Many people who use Source Filmmaker hear the word “compile” when they are trying to export or render their animations. While the terms are often used together, they are not exactly the same. Understanding the process can help you avoid common mistakes and produce better-looking videos.
Whether you are creating a short animation for YouTube, a cinematic game scene, or a portfolio project, learning how SFM processes your work is an important skill. A good compile setup can improve video quality, reduce crashes, and save you hours of troubleshooting.
In this guide, you will learn what SFM compile means, how the process works, and how to prepare your project before exporting. You will also find practical tips that beginners and experienced animators can use to create smoother and more professional results.
What Is SFM Compile and How Does It Work?
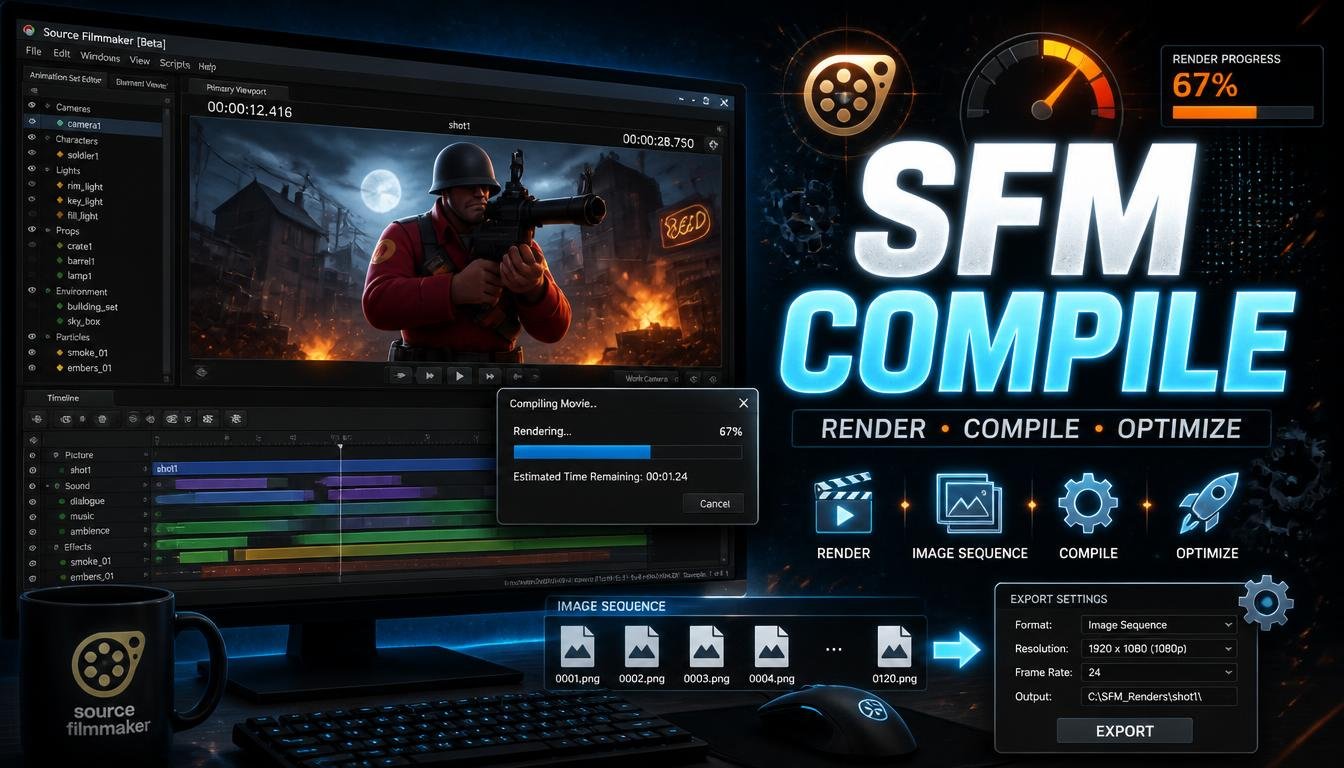
Many Source Filmmaker users use the word “compile” when talking about exporting a finished animation. In simple terms, compiling is the process of turning your completed project into a playable video or a sequence of image files. During this stage, Source Filmmaker reads everything in your project, including models, animations, lighting, cameras, and textures, before creating the final output.
Although the software handles most of the technical work automatically, understanding what happens behind the scenes helps you solve problems more quickly. It also allows you to choose better settings for quality and performance.
Think of your SFM project as a recipe. You have gathered all the ingredients—characters, maps, lights, sounds, and camera movements. The compile process is like cooking the meal. It combines every part into one finished result that you can watch or share.
Whether you are making a short gaming clip or a detailed cinematic movie, every successful animation depends on a proper compile process.
Compile vs Render vs Export
One reason beginners become confused is that people often use the words compile, render, and export as if they mean the same thing. While they are closely connected, each one describes a different part of the workflow.
Compile generally refers to preparing the project and creating the final output using all of your animation data.
Render is the process of generating each frame of the animation. During rendering, Source Filmmaker calculates lighting, shadows, reflections, particle effects, textures, and camera settings before producing every individual image.
Export is the final step where your rendered frames are saved as an AVI video or an image sequence such as PNG or TGA files.
For example, imagine you create a 20-second animation featuring a game character walking through a city street.
- You animate the character.
- You add lighting and camera movement.
- Source Filmmaker renders every frame.
- The finished frames are exported into a video file.
Many users simply call this entire workflow “compiling,” even though rendering and exporting are separate stages within the overall process.
Knowing these differences makes tutorials easier to follow and helps you understand error messages when something goes wrong.
What Happens During the Compile Process?
When you begin compiling your animation, Source Filmmaker performs several tasks one after another.
First, it loads your project and checks every asset used in the scene. This includes characters, props, maps, particle systems, and materials.
Next, the software processes lighting information. Shadows, reflections, ambient lighting, and special visual effects are calculated for every frame.
After that, camera movements and animations are evaluated. Every object’s position, rotation, facial expression, and motion is recreated frame by frame.
Finally, Source Filmmaker saves each rendered frame as either a video file or an image sequence, depending on the settings you selected.
This process can take anywhere from a few seconds to several hours. The rendering time depends on factors such as:
- Scene complexity
- Number of characters
- Lighting effects
- Resolution
- Frame rate
- Computer hardware
A simple scene with one character may render quickly, while a detailed cinematic containing multiple characters, smoke effects, and complex lighting may require much longer.
Example: Compiling a Simple Animation
Imagine you have created a 10-second animation of a character waving.
Your workflow might look like this:
- Import the character model.
- Place the character inside a map.
- Create the waving animation.
- Position the work camera.
- Add lighting.
- Save your session.
- Open the export window.
- Choose PNG image sequence.
- Select 1920 × 1080 resolution.
- Start rendering.
Once the process finishes, every frame is saved inside your chosen output folder. If you selected an image sequence, you can combine those images later using video editing software for higher quality and better stability.
This simple workflow is the same one used by many experienced SFM artists, even for larger projects.
Why Understanding the Compile Process Matters
Many animation problems happen because users skip important preparation steps before rendering.
For example, you might spend hours creating a scene only to discover that:
- A character is missing.
- Some textures appear pink or black.
- The camera points in the wrong direction.
- Audio is missing.
- The render stops halfway through.
Understanding how Source Filmmaker processes your project allows you to identify these problems before they waste your time.
It also helps you choose better settings for different types of projects. A short social media animation may not require the same quality settings as a cinematic portfolio piece.
Learning the compile workflow early makes future projects faster, smoother, and much less frustrating.
Prepare Your Project Before You Compile
One of the biggest mistakes beginners make is starting the compile process without checking their project first. Even a small issue can cause rendering errors, missing assets, or poor video quality.
Professional animators spend a few minutes reviewing their projects before every final export. This simple habit prevents many common problems and saves time in the long run.
The following preparation steps will help ensure your animation is ready for a successful compile.
Check Models, Maps, and Materials
Every object in your animation depends on the correct files being available.
Before rendering, inspect your scene carefully.
Make sure:
- Every character appears correctly.
- Props are visible.
- Maps load without missing objects.
- Materials display properly.
- Textures look normal.
- Particle effects are working.
If you notice bright pink or black surfaces, it usually means the required textures or materials cannot be found.
Likewise, if a model disappears completely, check whether all necessary files were installed correctly.
Taking a few minutes to inspect your assets before compiling can prevent hours of frustration later.
Review Camera and Timeline
A beautiful animation can still fail if the camera settings are incorrect.
Open your work camera and review the full animation from beginning to end.
Check that:
- The correct camera is active.
- Characters stay inside the frame.
- No unwanted objects appear.
- Camera movement is smooth.
- The animation starts and ends at the correct frames.
Also confirm that your timeline includes only the frames you want to export.
Many beginners accidentally render hundreds of extra frames because they forget to adjust the timeline range.
A quick review avoids unnecessary rendering time and creates a cleaner final video.
Save and Organize Your Project Files
Saving your work regularly is one of the easiest ways to protect your project.
Before compiling:
- Save the latest version.
- Create a backup copy.
- Organize textures and models.
- Choose a dedicated output folder.
- Rename important project files clearly.
For example, instead of naming a project animation1, consider using:
- City_Chase_Final
- Scout_Action_Scene
- Robot_Cinematic_v3
Clear file names make future editing much easier, especially if you work on multiple animations at once.
Use the Right Output Folder
Choosing the correct output location may seem like a small detail, but it helps keep your work organized.
Create separate folders for:
- Project files
- Image sequences
- Video exports
- Audio files
- Backup versions
For example:
SFM Projects
│
├── Robot Fight
│   ├── Session Files
│   ├── PNG Sequence
│   ├── Final Video
│   └── Audio
With this structure, you always know where your latest render is stored.
Check Your Computer Before Rendering
Rendering can place a heavy load on your computer, especially when working with large scenes.
Before starting the compile process:
- Close programs you do not need.
- Save all open work.
- Make sure enough storage space is available.
- Restart your computer if it has been running for many hours.
- Disable unnecessary background applications.
These simple steps can improve stability and reduce the chance of crashes during long renders.
Pre-Compile Checklist
Before clicking the export button, go through this quick checklist:
✅ All models load correctly.
✅ Textures and materials display properly.
✅ Lighting looks the way you want.
✅ Camera angles are correct.
✅ Timeline is set to the proper frame range.
✅ Resolution and frame rate are chosen.
✅ Output folder is selected.
✅ Project has been saved.
✅ Enough storage space is available.
✅ Test render looks good.
Spending five minutes on this checklist can prevent most of the common problems that SFM users experience during the compile process.
Step-by-Step Guide to SFM Compile Settings
After preparing your project, the next step is choosing the right compile settings. These settings affect how your animation looks, how long it takes to render, and how stable the process will be. Spending a few extra minutes selecting the correct options can save hours of re-rendering later.
If you are unsure which settings to use, start with simple values and increase the quality as you become more comfortable with Source Filmmaker.
Choose the Right Export Method
Source Filmmaker offers different ways to save your finished animation. Each method has its own advantages, depending on your project.
AVI Export
AVI creates a complete video file while rendering.
Advantages
- Quick and easy
- Ready to watch immediately
- Good for short test animations
Disadvantages
- If the render crashes, you may lose the entire export.
- Large file sizes.
- Lower flexibility for editing later.
AVI is useful for preview videos or short practice projects but is usually not the best choice for important work.
Image Sequence Export
Instead of creating one video file, SFM saves every frame as an individual image, usually in PNG or TGA format.
Advantages
- Higher image quality
- Easier to edit in video software
- Safer because completed frames are not lost if rendering stops
- Better for professional projects
Disadvantages
- Creates many image files
- Requires video editing software to combine frames
Most experienced SFM artists recommend using image sequences for final projects because they provide better quality and reliability.
PNG vs TGA
Both formats are popular choices for image sequence exports.
PNG
- Smaller file size
- Excellent image quality
- Supports transparency
- Ideal for most users
TGA
- Larger files
- Very high quality
- Common in professional workflows
If you are just getting started, PNG is usually the best option because it balances quality and storage space.
Configure Render Settings
Your render settings determine how detailed and smooth your final animation will look.
Resolution
Choose a resolution based on where your animation will be viewed.
| Resolution | Best Use |
|---|---|
| 1280 × 720 | Practice projects |
| 1920 × 1080 | YouTube videos |
| 2560 × 1440 | High-quality content |
| 3840 × 2160 | 4K cinematic projects |
For most creators, 1920 × 1080 provides excellent quality without creating extremely large files.
Frame Rate (FPS)
Frame rate controls how smooth your animation appears.
24 FPS
- Traditional cinematic look
30 FPS
- Standard online video
60 FPS
- Very smooth motion
- Excellent for gameplay-style animations
If you are uploading to YouTube, both 30 FPS and 60 FPS are good choices.
Anti-Aliasing
Anti-aliasing smooths jagged edges on characters and objects.
Higher values produce cleaner images but increase render time.
For most projects:
- Medium settings work well for previews.
- High settings are better for final exports.
Motion Blur
Motion blur makes moving objects appear more natural.
Use it carefully.
Too much blur can make fast action scenes difficult to see.
For dialogue scenes, subtle motion blur often creates a more cinematic appearance.
Ambient Occlusion
Ambient occlusion adds realistic shadows where objects meet.
For example:
- Under a character’s feet
- Around furniture
- Between walls and floors
This small effect can make your animation look much more realistic.
Start the Compile Process
Once your settings are ready, you can begin rendering.
A typical workflow looks like this:
- Save your project.
- Open the Export or Movie dialog.
- Choose AVI or Image Sequence.
- Select PNG if using image sequences.
- Set the resolution.
- Choose the frame rate.
- Select the output folder.
- Start rendering.
Avoid using your computer for heavy tasks while rendering, especially if your project contains detailed lighting or multiple animated characters.
Recommended Settings for Different Projects
YouTube Videos
- Resolution: 1920 × 1080
- Frame Rate: 60 FPS
- Format: PNG Image Sequence
- Anti-Aliasing: High
- Motion Blur: Low to Medium
This combination produces sharp videos that upload well to YouTube.
Portfolio Animations
If you are building a demo reel, focus on quality over speed.
Recommended settings include:
- 2560 × 1440 resolution
- PNG sequence
- High anti-aliasing
- Ambient occlusion enabled
- Careful lighting setup
The extra rendering time is often worth the improvement in image quality.
Quick Test Renders
Before rendering a long animation, export a short section first.
For example:
- 720p resolution
- 30 FPS
- AVI format
A one-minute test can reveal camera mistakes, lighting problems, or animation errors before you spend hours rendering the full project.
Common Setting Mistakes
Many beginners accidentally reduce the quality of their animations because of simple mistakes.
Watch out for these issues:
- Rendering at the wrong resolution
- Forgetting to select the correct camera
- Choosing AVI for very large projects
- Saving files to the wrong folder
- Exporting more frames than needed
- Using very high settings for simple practice scenes
Review your settings one final time before starting the render.
Fix Common SFM Compile Problems
Even experienced animators run into problems during the compile process. Fortunately, most issues have simple solutions once you know where to look.
This section covers the problems users encounter most often and explains practical ways to fix them.
Compile Fails or Freezes
Sometimes the render stops before finishing.
Common causes include:
- Low available RAM
- Very large scenes
- Corrupted project files
- Too many particle effects
- Running many programs in the background
How to Fix It
- Restart Source Filmmaker.
- Close unnecessary applications.
- Render smaller sections of the animation.
- Save your project under a new file name.
- Restart your computer before trying again.
If the problem continues, test a simpler scene to determine whether a specific model or effect is causing the issue.
Missing Textures or Models
One of the most common problems is opening a rendered animation and discovering that objects are missing or covered with bright pink and black patterns.
This usually happens because Source Filmmaker cannot locate the required asset files.
How to Fix It
- Verify that all models are installed.
- Check that textures were copied into the correct folders.
- Reinstall missing assets if necessary.
- Confirm that the map loads correctly before rendering.
Always inspect your scene carefully before starting the final export.
Black Screen or Blank Render
A finished render that only shows a black screen can be frustrating.
Possible causes include:
- Wrong camera selected
- Camera pointing away from the scene
- Lighting disabled
- Timeline exporting empty frames
Solution
Check:
- The active work camera.
- Camera position.
- Timeline start and end frames.
- Scene lighting.
Running a short preview render often helps identify the problem quickly.
Audio Is Missing
Sometimes the animation looks perfect, but there is no sound.
Possible reasons include:
- Audio track muted
- Export settings excluding audio
- Unsupported audio format
Solution
- Verify audio clips play correctly inside SFM.
- Check export settings.
- Test with a short animation first.
- Add audio later using video editing software if needed.
Many creators prefer adding final music and sound effects during video editing instead of during rendering.
Animation Looks Blurry
A blurry animation is often caused by low-quality settings rather than software problems.
Check:
- Resolution
- Anti-aliasing
- Motion blur
- Image compression
Rendering at 1920 × 1080 or higher usually produces much sharper results.
Rendering Takes Too Long
Large cinematic projects can require several hours to finish.
To reduce render time:
- Lower preview quality during testing.
- Hide objects that are not visible.
- Reduce unnecessary lighting effects.
- Render image sequences overnight.
- Upgrade RAM or storage if possible.
Remember that high-quality renders naturally take longer than quick previews.
Render Stops Before Completion
If your render stops halfway through:
- Check available disk space.
- Confirm your output folder is accessible.
- Make sure your computer is not entering sleep mode.
- Restart the render after saving your project.
Image sequences are especially useful here because completed frames are usually preserved even if the process stops unexpectedly.
Troubleshooting Table
| Problem | Possible Cause | Solution |
|---|---|---|
| Compile freezes | Low memory | Close programs and restart SFM |
| Missing textures | Missing asset files | Reinstall textures or materials |
| Missing models | Incorrect installation | Verify model folders |
| Black screen | Wrong camera | Select the correct work camera |
| Audio missing | Export settings | Check audio options or edit later |
| Slow rendering | Complex scene | Reduce effects or render overnight |
| Blurry video | Low resolution | Increase resolution and anti-aliasing |
| Render crashes | Large project | Render smaller sections or use image sequences |
Quick Troubleshooting Checklist
Before starting another render, ask yourself:
- ✓ Did I save the latest version?
- ✓ Is the correct camera active?
- ✓ Are all models visible?
- ✓ Do textures appear correctly?
- ✓ Is the frame range correct?
- ✓ Is enough storage space available?
- ✓ Did I test a short render first?
- ✓ Am I using image sequences for large projects?
Following this checklist can solve many issues before they become major problems.
Improve Performance and Get Better Results
Once you understand the basic compile process, the next goal is making your renders faster and your animations look more professional. You do not always need expensive hardware to create great results. In many cases, a few smart workflow changes can save time while improving quality.
The following tips are used by many experienced Source Filmmaker creators and can help beginners avoid common performance problems.
Reduce Compile Time
Rendering can take anywhere from a few minutes to several hours depending on the complexity of your project. While you cannot eliminate render time completely, you can reduce unnecessary delays.
Close Background Programs
Before starting a long render, close applications you do not need.
Examples include:
- Web browsers with many open tabs
- Music streaming software
- Games
- Video editors
- File downloads
This frees up memory and allows Source Filmmaker to use more of your computer’s resources.
Render Smaller Sections First
Instead of rendering a full five-minute animation immediately, render a short section first.
For example:
- First 10 seconds
- Camera transition
- Action sequence
- Final scene
Testing smaller clips makes it easier to spot mistakes before committing to a long render.
Keep Your Scene Organized
Large scenes often contain objects that never appear on screen.
Consider removing or hiding:
- Extra props
- Hidden characters
- Duplicate lights
- Unused particle effects
A cleaner scene usually renders faster and is easier to edit.
Use an SSD
If your computer uses a Solid State Drive (SSD), save your project and output files there whenever possible.
Compared to traditional hard drives, SSDs can:
- Load assets more quickly
- Save rendered frames faster
- Improve overall workflow
While an SSD will not magically double rendering speed, it can reduce delays caused by reading and writing large numbers of files.
Improve Final Video Quality
Fast rendering is useful, but quality matters just as much. Small improvements to your settings can make your finished animation look far more polished.
Choose the Right Resolution
For most creators, these resolutions work well:
- 1280 × 720 – Practice and quick previews
- 1920 × 1080 – Standard YouTube uploads
- 2560 × 1440 – High-quality projects
- 3840 × 2160 – 4K cinematic work
Avoid rendering in very high resolutions unless your computer can handle the extra workload.
Use Better Lighting
Lighting has one of the biggest impacts on the appearance of an animation.
Good lighting helps:
- Characters stand out
- Facial expressions look clearer
- Shadows appear more realistic
- Scenes feel more cinematic
Experiment with different light positions instead of relying only on default map lighting.
Increase Anti-Aliasing Carefully
Higher anti-aliasing produces smoother edges around characters and objects.
However, very high settings also increase render time.
A good approach is:
- Medium settings during testing
- High settings for the final export
This balances speed and quality.
Render as Image Sequences
Many professional SFM users recommend rendering to PNG image sequences instead of AVI videos.
Benefits include:
- Better image quality
- Easier editing
- Recovery after interrupted renders
- Reduced risk of losing an entire project
If rendering stops unexpectedly, you often keep all completed frames instead of starting from the beginning.
Professional Export Workflow
A professional workflow usually involves more than just rendering inside Source Filmmaker.
Step 1: Render PNG Images
Export your animation as a PNG image sequence.
This gives you a separate image for every frame.
Step 2: Import Images into a Video Editor
Popular editing programs include:
- DaVinci Resolve
- Adobe Premiere Pro
These applications allow you to:
- Add music
- Insert sound effects
- Create titles
- Apply color correction
- Trim scenes
- Add transitions
Step 3: Export the Final Video
After editing, export your project using a common video format such as MP4 with the H.264 codec.
This format works well for:
- YouTube
- Social media
- Personal portfolios
- Client presentations
Image Sequence vs AVI
Choosing the right export method depends on your project.
| Feature | Image Sequence | AVI |
|---|---|---|
| Image quality | Excellent | Good |
| Easy editing | Yes | Limited |
| Crash recovery | Excellent | Poor |
| File management | Many files | One file |
| Best for | Final projects | Quick previews |
For important animations, image sequences are usually the safer and more flexible option.
Tips for Long Rendering Sessions
Large cinematic projects may take several hours to finish.
To improve stability:
- Save your project before rendering.
- Restart your computer if it has been running all day.
- Disable automatic sleep mode.
- Make sure enough storage space is available.
- Avoid moving or deleting project files while rendering.
Following these habits helps reduce interruptions during long exports.
Best Practices for Reliable SFM Compile Projects
Successful animations depend on consistent habits. Small improvements to your workflow can prevent many common compile problems before they happen.
Build Your Scene in Stages
Avoid creating everything at once.
Instead:
- Import models.
- Test animations.
- Add lighting.
- Add particle effects.
- Render a preview.
- Make adjustments.
- Create the final export.
This approach makes it easier to identify mistakes.
Test Before the Final Render
Never assume everything is perfect.
Render a short preview first.
Check:
- Camera movement
- Character animation
- Lighting
- Audio timing
- Facial expressions
Finding problems early saves a great deal of time.
Keep Project Files Organized
Good organization makes future edits much easier.
Example folder structure:
SFM Projects
│
├── SciFi Movie
│   ├── Session Files
│   ├── Models
│   ├── Textures
│   ├── Audio
│   ├── PNG Sequence
│   └── Final Video
This structure helps you locate files quickly, especially when working on multiple projects.
Save Multiple Versions
Instead of saving over the same file repeatedly, create new versions as your project grows.
For example:
- Project_v1
- Project_v2
- Project_v3
- Project_Final
- Project_Final_Edit
If something goes wrong, you can return to an earlier version without losing all your work.
Keep Assets Organized
Downloaded models, textures, and maps should be stored in clearly labeled folders.
Avoid deleting assets until the project is completely finished.
Missing files are one of the most common causes of compile problems.
Learn from Every Project
Every completed animation teaches something new.
After finishing a project, ask yourself:
- Which settings worked well?
- What caused delays?
- Which errors appeared?
- How can the next project be improved?
Keeping simple notes after each render can help you develop a faster and more reliable workflow over time.
10-Point Final Compile Checklist
Before starting your final render, review this checklist:
✅ Project saved
✅ Correct work camera selected
✅ Models visible
✅ Textures display correctly
✅ Lighting checked
✅ Timeline reviewed
✅ Resolution confirmed
✅ Frame rate selected
✅ Output folder ready
✅ Test render completed
Following this checklist before every project greatly reduces the chance of unexpected problems.
Conclusion
Learning SFM compile is an important step toward creating better animations in Source Filmmaker. Although the process may seem complicated at first, it becomes much easier once you understand the difference between compiling, rendering, and exporting.
Preparing your project carefully, choosing the right render settings, and following a consistent workflow can prevent many common errors. Simple habits such as checking textures, reviewing your timeline, and saving backup versions make a big difference during long rendering sessions.
For most users, exporting to a PNG image sequence offers the best balance of quality and reliability. Combined with a video editor, this workflow provides greater control over the final result and reduces the risk of losing progress if rendering is interrupted.
As you gain experience, continue experimenting with lighting, camera angles, and render settings. Each project will help you improve your skills and produce smoother, more professional animations.
Frequently Asked Questions
What does SFM compile mean?
SFM compile is the process of rendering and exporting a Source Filmmaker project into a finished video or an image sequence.
Should I export as AVI or PNG image sequence?
PNG image sequences are usually the better choice because they offer higher quality, easier editing, and better recovery if rendering stops unexpectedly.
Why does my SFM compile keep crashing?
Crashes are often caused by low memory, complex scenes, missing assets, or insufficient storage space. Closing background programs and rendering smaller sections can help.
What are the best render settings for YouTube?
For most projects, use 1920 × 1080 resolution, 60 FPS, high anti-aliasing, and export as a PNG image sequence for the best balance of quality and performance.
How can I make SFM compile faster?
Reduce scene complexity, close unnecessary applications, render short test clips first, use an SSD if available, and organize project assets before exporting.